Tuesday, November 18, 2014

Easy homemade yeast-free flatbread

Recently I've been watching alot of TV, especially food & cooking channels. The one chef that I like most at the moment is Rachel Khoo on BBC Lifestyle, and it always seems a breeze and pretty sight to see how she prepare the delicious dishes. I was very very tempted to go down to Kinokuniya last Saturday to grab a copy of her cookbook as she was also in town for book-signing!

So I was so inspired when I saw an episode where she was doing flatbread! Sadly not all her recipes are featured online, and it's back to googling for "quick & easy" flatbread recipe.

I was quite lucky to chance upon this recipe, and it's sooo good and easy-peasy that I did it 3 times (but half the recipe each time) within a week, and another time making them into pizza (which I will write in a separate post)! What's even better is that there is very little washing, no machine needed and can be ready in less than 30 mins (including cooking and washing).

Easy homemade yeast-free flatbread
Recipe adapted from Keepin' it Kind
(yields 10 mini flatbread, about 4" each)

Ingredients/ Method
1 cup all-purpose flour (extra to flour the surface)
1/2 tablespoon baking powder
1/4 teaspoon salt
1/4 cup water
1/8 cup non-dairy milk (I used half whipping cream-half water)
1 tablespoons olive oil

  1. Combine all ingredients in a bowl and mix well with a spoon until a dough forms.
  2. Use hand to knead until it is soft and pliable. The The ball of dough should be soft, pliable, but not sticky. If it is sticky, add flour by the tablespoon until it no longer sticks to your finger when touched.
  3. Transfer the ball of dough to a floured surface. 
  4. Divide the dough into 10 small balls. 
  5. Take one ball and use your fingers to flatten it into a circle. Use a rolling pin to roll the dough out into a 4" circle-ish shape. 
  6. Place the flattened dough on the prepared baking sheet and repeat with the remaining dough.
  7. Heat a frying pan over medium-high heat (I did on low-medium heat and with slightly longer cooking time). Place one of the circles of dough in the pan and cook until bubbles begin to form and the edges begin to lift, about 1 to 2 minutes. Use tongs to quickly flip it over and cook for another 1 to 2 minutes. Remove from the pan and place on a plate. Cover with a clean kitchen towel to keep warm. Repeat with the remaining circles of dough.
  8. If they are not eaten immediately, let them cool before transferring them to an airtight container. Refrigerate for 3 to 4 days.


The 1st batch of dough, I prepared four circles for our lunch and left the remaining flattened dough without covering for more than 4 hours. It turned out dry and it remained hard even after pan-frying - lesson learnt - rolled out the dough only when ready to cook, and keep the remaining covered with a slightly damp clean kitchen towel.  Another lesson - don't pan fry for too long or else it will turn out hard, though it can still be eaten like a pizza...haha

After the dough is prepared, I let it rested and covered loosely with cling wrap, whilst I prepared the fillings. The fillings can be versatile, and as usual I used whatever is remaining in the fridge, which I sauteed them with black pepper, salt, mixed herbs and dried parsley - potato, shiitake mushrooms, tomato, yellow onion, and add an boiled egg. I also spread some Japanese mayonnaise on the flatbread. Both my boy and I feel like we can eat this everyday, but of course with different variation of fillings!

Tuesday, November 11, 2014

Meatball Pasta

My momentum to blog was slightly interrupted due to the short school break for PSLE marking week. During the school break, I prefer to venture out with my boy and spend more time with him rather than sitting in front of the laptop. Oft times, once I turned on the laptop, I would be unknowingly sitting hours in front of it and neglect my little one.

Whilst writing this post, I'm feeling of a mental block and thoughts incoherent. Anyway just record and share another quick and easy meal here.  Since I usually cook for 2 person, I do not do marketing that often. I like to use up whatever limited ingredients and condiments in my kitchen to conjure a satisfying meal of Meatball pasta. Enjoy!

Meatball pasta
(served 2)

Ingredients/ Method
a) Linguine or any pasta

b) 80g minced pork
1/4 yellow onion, diced
1 small garlic, diced finely
salt, crushed pepper, mixed herbs and dried parsley, to taste
1 cream cracker, crushed finely
1 heap tbsp corn flour

c) 1 clove garlic, diced finely
2 tomato, diced coarsely
200g Spaghetti sauce (I used Prego Italian fresh mushroom sauce)

d) 1 hard boiled egg, sliced into quarts

  1. In a pot of hot water, add 1 tsp salt, boil pasta per instruction indicated on box.
  2. Drained and toss some olive oil to prevent pasta from sticking (if not cooking immediately). 
  3. In a bowl, marinate minced pork with all ingredients (b) until well mixed. Roll into 8 small balls and set aside for at least 30 mins. 
  4. Fry the meatball in a pot (with enough oil to cover at least up to half the meatballs) on medium heat, and until golden brown. Takes about 5 to 7 mins. Remove and set aside. 
  5. In a saucepan, saute garlic till fragrant. Add in tomato and give it a few stirs, followed by spaghetti sauce. Turn off the heat when sauce boils. 
  6. Add in pasta to the sauce and stir evenly. Next add in meatballs and stir.
  7. Ready to serve, and add sliced egg on top of the pasta. 

Saturday, October 11, 2014

Chicken chop & Rosti

Being a SAHM for couple of months, it can be quite bored at times. I didn't fill my day with activities other than preparing lunch, the occasional baking, fetching my boy from school and coaching on his school work. When I was working, I'd imagined that it would be super shiok to stay at home. Not that I'm complaining, it's indeed relaxing and definitely feel good to be away from the work and office stress.

The best part of course is the precious time I'm spending with my boy who is growing up by the day. I'm happy that I've made up for the lost time. I've also made some efforts to catch up with my friends and colleagues whom we had little time to chit chat in the past. The downside of not working is a super relaxed mind (almost inactive), and I do miss the times where the mind is constantly being challenged. Oh ya, on this note, I had a nightmare the other day where I suffered from dementia, imagine how scary it is!!

Anyway, here's another lunch - Chicken chop and Rosti - we had this week.

Rosti 
(serves 4-5 persons as sides)

Ingredients/ Method: 
4 potatoes, peeled
1/ 4 yellow onion, diced (optional)
1 tsp salt
2tbsp corn starch
  1. Grate the potatoes coarsely into a big bowl. 
  2. Squeeze out as much juice as possible from the potatoes. As an additional step, I use kitchen towels to squeeze out the juice the 2nd time. 
  3. Season the grated potatoes with salt. 
  4. Add corn starch and coat evenly. 
  5. Heat up pan with about 2 - 3 tbsp oil. Using hand to compact the grated potatoes into ball and flatten it. (There's still quite a lot of juice and I squeeze them out again before forming ball.)
  6. Place the flatten potatoes on the pan gently. Using spatula, lightly press down the potatoes rosti and pan fried until golden brown on both sides. 
  7. Serve immediately. 

Chicken chop 
(serves 3)

Ingredients/ Method: 
500g chicken thighs
2 tbsp oyster sauce
1 tsp sesame oil
4 cloves garlic, crushed with skin on
1/2 tsp garlic powder
1/2 tsp white pepper
  1. Mix all seasonings and marinate the chicken thighs overnight. 
  2. In a pan with about 1 tbsp oil on medium-high, slightly shake off the marinate from the chicken and pan fried on skin side first for about 1 min. Turn to the other side for another minute to lock the juices. (*Keep the marinate and garlic to prepare simple mushroom sauce.) 
  3. Continue cooking on medium-low heat until fully cooked.  
Mushroom sauce 
(serves 3)

Ingredients/ Method: 
3 tbsp minced shiitake mushroom stems
100g cooking cream
  1. Using 1 tbsp of the remaining oil from cooking the chicken and the marinate*, saute the garlic (also from the marinate) until fragrant. Remove the garlic. 
  2. Next, saute the mushroom till fragrant. Add cooking cream (add some water if dry up too fast) until mixture boils. 
  3. To serve, drizzle over the chicken chop. 
Note: The mushroom stems were left-over from my earlier cooking. You can use whole mushroom as well.

Thursday, October 9, 2014

Chocolate fudge yellow cake

This was the Chocolate fudge yellow cake which we had for our Saturday dinner. But because we were so full after our dinner, my lil boy decided to skip it, and T and me shared a slice.
I had baked this cake only because there were some egg yolks left-over, and it's quite an eye-sore to see the egg yolks sitting in the fridge. It will be a waste to throw them away either. Yes, this is a pure egg yolk cake!
As my cake doomed quite a fair bit, I was eating the "scraps" after trimming the cake. Comparing, I actually like the cake better on its own, without the frosting. It tasted like good ol' butter cake! T likes the chocolate frostings, and wished I had slabbed more (and more)! Yumz

Yellow Butter Cake
(Recipe adapted from Joy of Baking, but size reduced to 6" round cake)

Ingredients/ Method: 
150g cake flour, sifted
1 3/4tsp baking powder
1/4 tsp salt (I omit)
85g unsalted butter, room temperature (I used salted butter)
132.5g granulated white sugar (I reduced to 120g)
55g egg yolks, about 3 large egg yolk
120ml milk
1 tsp pure vanilla extract

  1. In a bowl, sift or whisk flour with baking powder and salt.
  2. Using electric mixer, beat the butter until soft and creamy (about 1 -2 mins).
  3. Gradually add sugar and beat until light and fluffy (about 3-5 mins).
  4. Add egg yolks in 2 batches, beating well after each addition. Scrape down the sides of the bowl as need.
  5. Add vanilla extract and beat until combined.
  6. With mixer on low speed, add 1/3 flour to batter, followed by 1/2 milk. Then 1/3 flour, remaining milk, and lastly remaining flour. Mix well with each addition.
  7. Transfer batter to lined cake pan.
  8. Bake in pre-heated oven at 180deg C for 35 - 40 mins, or until skewer inserted in centre of cake comes out clean.
  9. Place the cake on a wire rack to cool in the pan for about 10 minutes. Then invert the cakes onto a greased rack.
  10. Cool completely before frosting.

Chocolate Frosting
(Recipe adapted from Kitchen Corner, quantity halved for 6" round cake)

Ingredients/ Method: 
37.5g cocoa powder
93.5ml water
150ml evaporated milk (I used whipping cream)
75g sugar
1/4 tsp salt
3/4 tsp vanilla extract
1 1/2 egg yolks
45g corn flour
3/4 tsp instant coffee
45g butter

  1. Mix everything in a double boiler except butter and keep on stirring with a hand whisk until the mixture thickens.
  2. Lastly add in the butter until a smooth  and spreadable consistency.

Wednesday, October 8, 2014

Our Saturday dinner

It's has been ages that I've prepared a full course dinner as we would usually dine out on Saturdays. The feeling of eating at home, just the 3 of us, home-cooked meal, is really warm and good. If you have not been dining together with your family at home, I urge you to go ahead and do it (immediately)!

Actually just before getting the dinner ready, I was quite pissed with the boys as they seem to take ages (couple of hours) to help me get a loaf of french loaf and orange juice. By the time they got back home, it was almost half-past-7 and the mood of cooking dinner was gone. Anyway I still proceed grudgingly. Thankfully I did it, when we sat down for dinner, my fumes were gone and was feeling satisfied with the dinner, and feeling good to dine together as a family.

Our 4-course dinner includes garlic bread, creamy pumpkin soup, pan fried salmon with caramelized apples, chocolate fudge yellow cake (recipe to be posted later), and of course accompanying sparkling moscato and orange juice (for the lil boy).
Garlic Bread
(serve 4 slices)

Ingredients/ Method:
French loaf or baguette (store-bought)
3 cloves garlic, finely minced
40g salted butter
2 tsp dried parsley

  1. Mix finely minced garlic and dried parsley to butter. 
  2. Slice french loaf and spread garlic-butter generously. 
  3. Bake in pre-heated oven at 150 deg C for 7-10 mins, or until golden brown. 

Creamy Pumpkin Soup
(for 3 servings)

Ingredients/ Method:
200g pumpkin puree
20g yellow onion, chopped
white salt n pepper to taste
1/4 cup cream
1/4 cup chicken stock + 1/3 cup water
some black pepper and dried parsley, to garnish

  1. In a small pot, add olive oil and saute yellow onion till translucent. 
  2. Add in pumpkin puree and continue stirring till mixture starts to boil. Sprinkle salt and white pepper to taste. Stir to mix well.
  3. Add in cream, chicken stock and water and continuing stirring till mixture boil. Remove from heat. 
  4. Using a handheld blender, blend the pumpkin soup till smooth. 
  5. Sprinkle some black pepper and parsley before serving. 

Pan Fried Salmon with Caramelised Apples
(for 3 servings)

Ingredients/ Method: 
300g salmon, sliced into 6 portions (length-wise)
salt and black pepper, to taste
1/2 tbsp butter

1 apple, peeled and cored, thinly sliced (about 3mm)
10g raisins, soaked and drained
slightly less than 1/8 tsp nutmeg
1/4 cup orange juice

  1. In a pan, add butter and pan fried salmon on medium-high heat. Sprinkle some salt and black pepper to taste. Continue pan-fried till golden brown and and looks crispy. Set aside. 
  2. In the same pan with remaining oil, cook apple and raisins till slightly soft. Stir occasionally. 
  3. Add nutmeg and toss apple and raisins evenly. Continue to cook for another 2-3 mins. 
  4. Add orange juice and let it simmer on low heat until juice reduced to slightly less than 3 tbsp. Occasionally stir to avoid apple & raisins getting burnt. 
  5. To assemble, scoop caramelised apple-raisins into 3 equal portions on serving plate. Followed by salmon. Drizzle remaining caramelised sauce over the salmon. 
  6. Ready to serve. 


This post is linked to the event Little Thumbs Up (Oct 2014 Event: PUMPKIN) organised by Zoe (Bake for Happy Kids) and Mui Mui (My Little Favourite DIY) and hosted by Eileen (Eileen's Diary).

Thursday, October 2, 2014

Salmon, pumpkin & cheese mini pies

Since I've been cooking lunches during most of the weekdays, my pathetic knowledge of cooking is really being put to test. Without letting my boy getting bored with my home-cooked lunches, and myself cooking the same old thing, I will try to prepare different dishes for the little one. Luckily, there are many generous bloggers sharing their interesting recipes, so it is not a very difficult feat. The only tough part is choosing which one to cook/ prepare first.
Before bake
Here's another salmon recipe, and using mini-pies recipe which I bookmarked from Domestic Goddess Wannabe. I've also added some pumpkin puree as I like to incorporate vegetables to make our meal more wholesome and healthier. It turned out really easy and delicious. We had it for our lunch, and the next day, the boys re-heated them as their breakfast!
I'm copying the recipe here, with some modifications, for ready reference.

Salmon, Egg and Cheese Mini-Pies
(makes 4 ramekins)
(Recipe from Domestic Goddess Wannabe, with modifications)

Ingredients/ Method:
150g salmon
1/4 yellow onion, diced
3 tbsp pumpkin puree
1 egg, boiled and chopped
1/2 cup shredded Cheddar/mozzarella
Salt and pepper to taste
Black pepper to sprinkle
  1. Pan-fried salmon. Roughly mash them using fork. Set aside.
  2. In a pan, saute onions for 2-3 minutes in extra-virgin olive oil.
  3. Add salmon, salt and pepper. Stir to mix.
  4. Add pumpkin puree, stir to mix. Transfer into a bowl to cool.
  5. Greased ramekins with vegetable oil.
  6. Add a scant tablespoonful of batter, followed by 2 tablespoons of filling and 1-2 tablespoons of Cheddar/mozzarella. Top with another tablespoon of batter.
  7. Sprinkle with black pepper.
  8. Bake at 180C for 30 minutes, or until the tops of the pies have turned golden brown.
  9. Cool completely before removing from muffin pan and storing in fridge (2-3 days) or freezer (up to 3 months).
For the Batter using Ready-Made Bisquick Mix:
1/4 cup Bisquick mix* (pls refer below for homemade bisquick mix)
1/4 cup milk - this can be whole milk or low-fat milk
1 egg
  1. Whisk Bisquick mix, milk and eggs in a bowl until combined.
Homemade Bisquick Mix:
3 cups plain flour, sifted
1/2 tablespoons baking powder, sifted
56.7g cold butter or shortening
  1. Place flour, baking powder and butter in a mixing bowl. 
  2. Use a pastry cutter (or food processor) to cut in the cold butter until evenly incorporated. (I used rubbing-in method.) 
  3. Keep in refrigerator for up to 4 months.

Wednesday, October 1, 2014

Salmon with mushroom ragout

I like to cook salmon because it's the easiest fish that I know how to prepare, and one of the fishes where there are not many bones. I also like them to be fatty & oily, the goodness of salmon, as these gives us the vitamins A and D, and they are also rich in omega-3 fatty acids.
To buy salmon in small pieces is actually very expensive, I was paying more than $16 for about 200g salmon the other day. So when I saw the supermarket having promotion for whole salmon, I almost grab it immediately. Imagine I paid about $35 but I have the whole fish, and I get to share with my aunt and feed the brood. My aunt agreed that we will buy and share whole salmon the next time!

So, here's one of few salmon dishes that I'm going to prepare.

Salmon with mushroom ragout 
(serves 3)

A) 3 pieces of salmon
salt and black pepper to taste

B) 2 potatoes, peeled and cubed
1/2 tsp salt

2 tbsp mayonaise
dash of black pepper
dash of dried parsley

C) 15 shiitake mushrooms, chopped into big chunks (diced the mushroom stems - very small cubes)
white beech mushrooms

D) 1 yellow onion, sliced in rings
broccoli

  1. In a pot of boiling water with salt, boil potatoes for about 5-10 mins or till potatoes is soft. Drained potatoes and in a bowl, mash them using fork. 
  2. Add mayonnaise, black pepper and dried parsley to mashed potatoes. Stir to mix evenly. Set aside. 
  3. In a pan, add 2 tsp olive oil and fry broccoli. Add salt to taste. Add 2 tbsp water and let it simmer till almost reduced. Set aside. 
  4. Saute yellow onion till become translucent. Set aside. 
  5. In a pan with 1 tbsp olive oil, medium-low heat, fry the diced mushroom stems for about 2 mins before adding the big chunks mushrooms, followed by beech mushrooms. Fry till fragrant, add salt and black pepper to taste, about 5-7 mins. Add 1 tbsp water and let it simmer for about 1-2 mins. Set aside. 
  6. In a non-stick pan with 2 tbsp olive oil, pan fried salmon and sprinkle salt and black pepper to taste. 
  7. To serve, scoop dollop of mashed potatoes on plate, add mushrooms, followed by salmon. Put broccoli and onions at the side. Sprinkle some black pepper and dried parsley on the salmon. 

Tuesday, September 30, 2014

Pumpkin ondeh ondeh

Previously, I've mentioned that my fil has a secret garden, and occasionally he will harvest the vegetables and fruits and pass them to us. This time round, we got a big pumpkin and some dried roselles from him. Everyone at my aunt's place went 'wow' when they saw the pumpkin, it was really big at about 3.5kg, nice and round. My fil said that he has 'accidentally' harvested the pumpkin, otherwise it would have grown bigger.
Too bad I didn't take a picture of the pumpkin when it was in whole. The pumpkin is sweet and I managed to keep the seeds with intention to grow them too.
With about half the pumpkin left, I took it back from my aunt's place and have in mind a few recipes to try out. I've pureed the entire remaining pumpkin, and used some for my hubby's favourite ondeh ondeh. The balance pumpkin puree is in the freezer, waiting to be transformed!
The pumpkin taste is not imminent in the kueh, but the skin is really soft and with enough palm sugar, I can feel the ooze-sensations!

Pumpkin ondeh ondeh

Ingredients/ Method:
(Recipe modified from previous Sweet potato ondeh ondeh)
200g pumpkin puree
200g glutinous rice flour
10 tbsp water or less (depends on the moisture of pumpkin)
1.5 tsp corn oil
chopped pieces of gula melaka
freshly grated coconut (without skin)

  1. Steam pumpkin till soft.
  2. Steam grated coconut for about 5-10 mins. When ready, sprinkle a little salt over the grated coconut. (This will prevent the grated coconut from turning bad/rancid.) Set aside.
  3. In a bowl, mash pumpkin and add in glutinous flour and oil. 
  4. Slowly add in water and knead till smooth dough is formed. Add more water if dough is dry. If dough is too sticky, add more glutinous rice flour. 
  5. Chop gula melaka to bite size.
  6. Dust hand with some glutinous rice flour, divide dough (about 15-20g each) and wrap in the gula melaka (about 1 tsp or as much as you can to get ooze-sensation). 
  7. Put wrapped balls into big pot of boiling water. The balls are ready when it floats on the surface of water. 
  8. Toss on plate filled with grated coconut.
  9. Ready to be served.

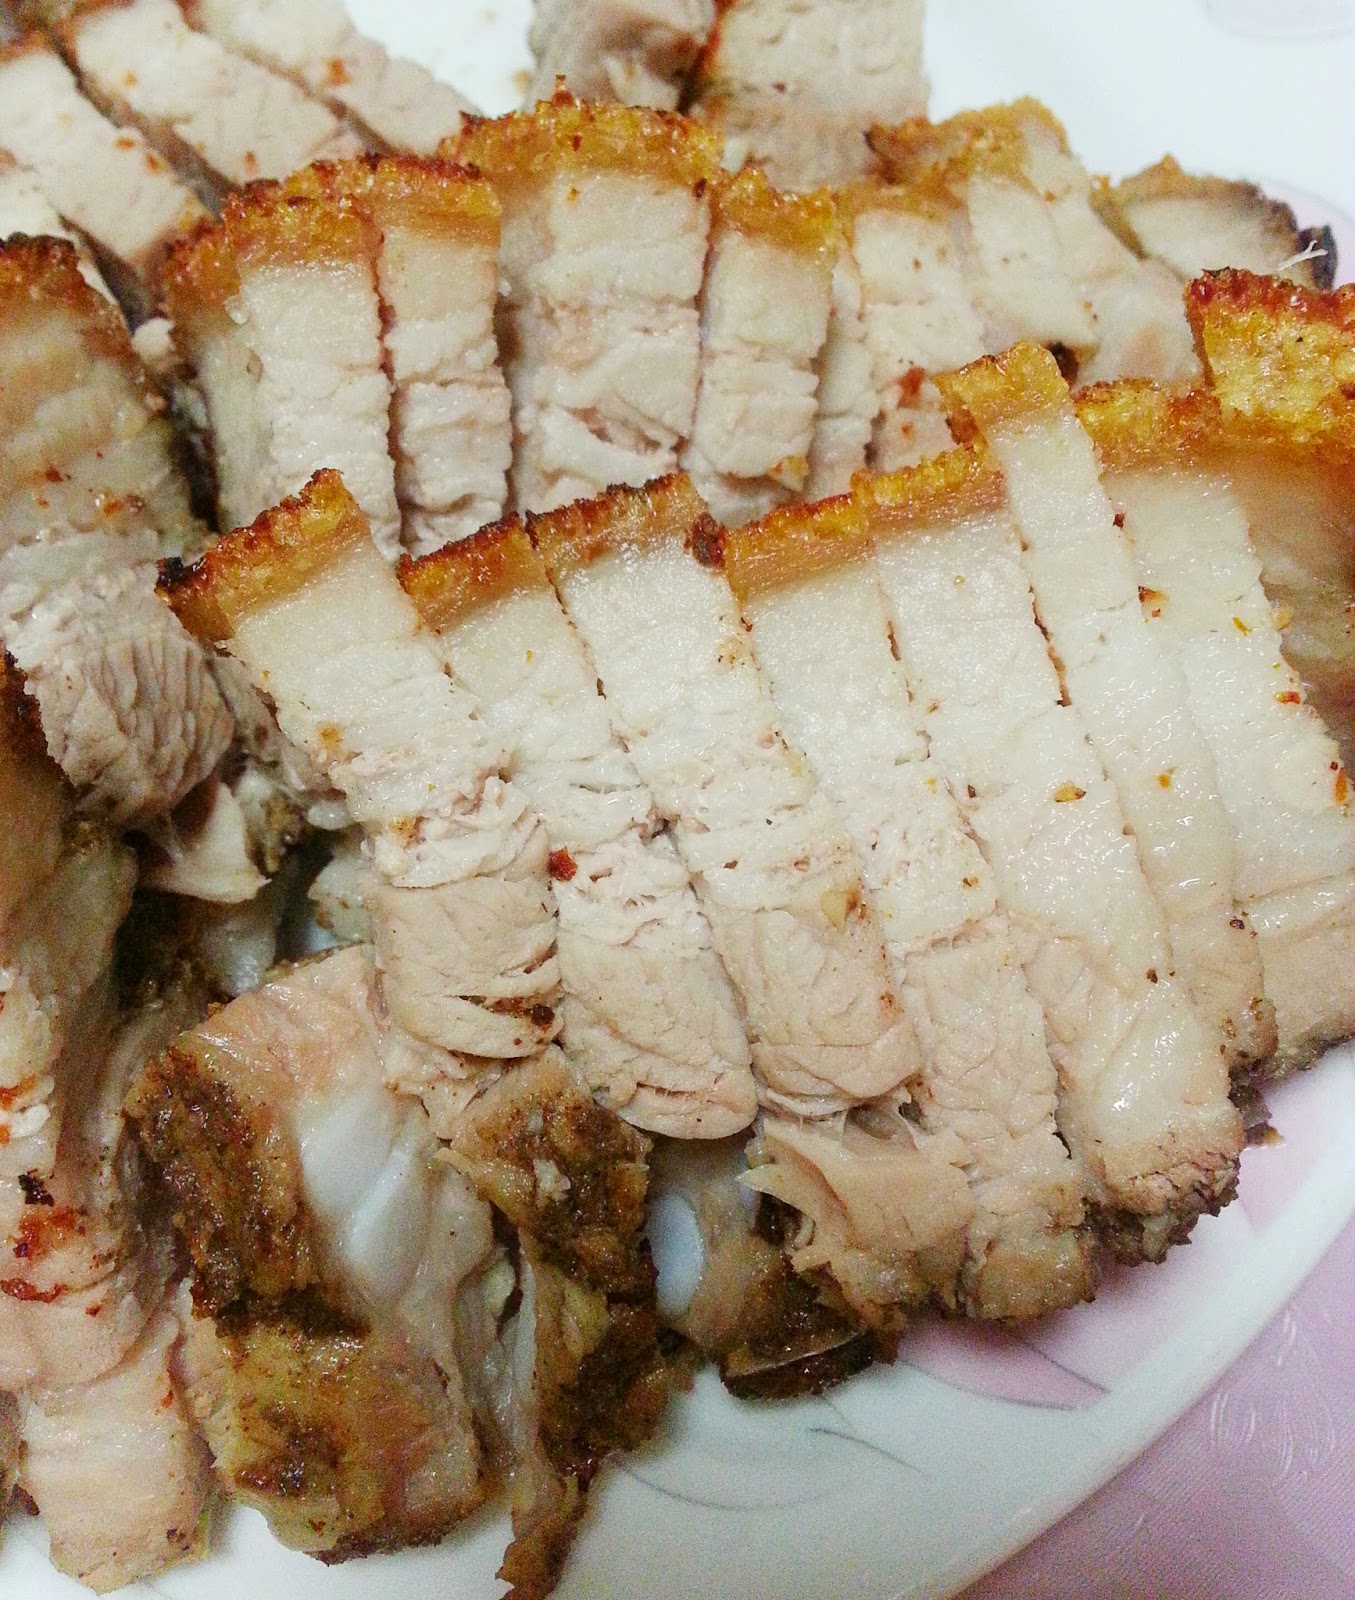
Crispy roast pork belly v.3

Yet another crispy roast pork belly.

A tough fight amongst the few recipes (here & here) I've tried so far, but I think this is probably having a slight edge over the others because the skin was extra crispy! *Crackkk*
I'm copying the recipe here for ready reference.

Crispy roast pork belly 
(Recipe from MiMi Bakery House, originally from Vivian Pang's kitchen)

Ingredients/ Method 
500g pork belly, skin on with no bones (ask for very fat pork belly!)
1 tablespoon salt (I reduced it to 1 tsp, it was mildly saltish. Will increase to 1 1/4 tsp - 1 1/2 tsp the next time.)

Marinate for the bottom of the pork belly
1 teaspoon oyster sauce
1 teaspoon pepper
1 teaspoon 5 spice powder
3 gloves garlic (smashed to a paste)
*mix together and set aside
Some rice vinegar to brush on the pork

  1. Bring a pot of water to boil. Add in pork belly and blanch for 15 minutes, drained. With kitchen towel wipe the pork belly dry.
  2. Prick holes all over pork skin with needles or something similar as much as you can. Make few cuts under belly with sharp knife to ease the marinate ingredients penetrate further and lead to more flavour. 
  3. Add salt to pork belly, rub on both skin and meat surface. 
  4. Apply bottom marinate ONLY underbelly (NOT SKIN). Massage evenly on the meat surface. 
  5. Wrap the pork belly with aluminium foil, skin facing up. Brush the skin with vinegar. 
  6. Place the pork into fridge, skin side up uncovered for about 1-2 hours. 
  7. Remove the foil from the marinated pork and leave it to reach at room temperature. 
  8. Preheat oven at 200C. Place the pork on roasting rack with a pan underneath. Roast the pork for about 25 minutes. 
  9. Remove the pork from oven, and turn up the temperature to 250C (grill or top heat only).
  10. Return pork to oven and bake for another 25 minutes or until the skin is slightly charred.
  11. Leave it cool down before chopping.

Thursday, September 25, 2014

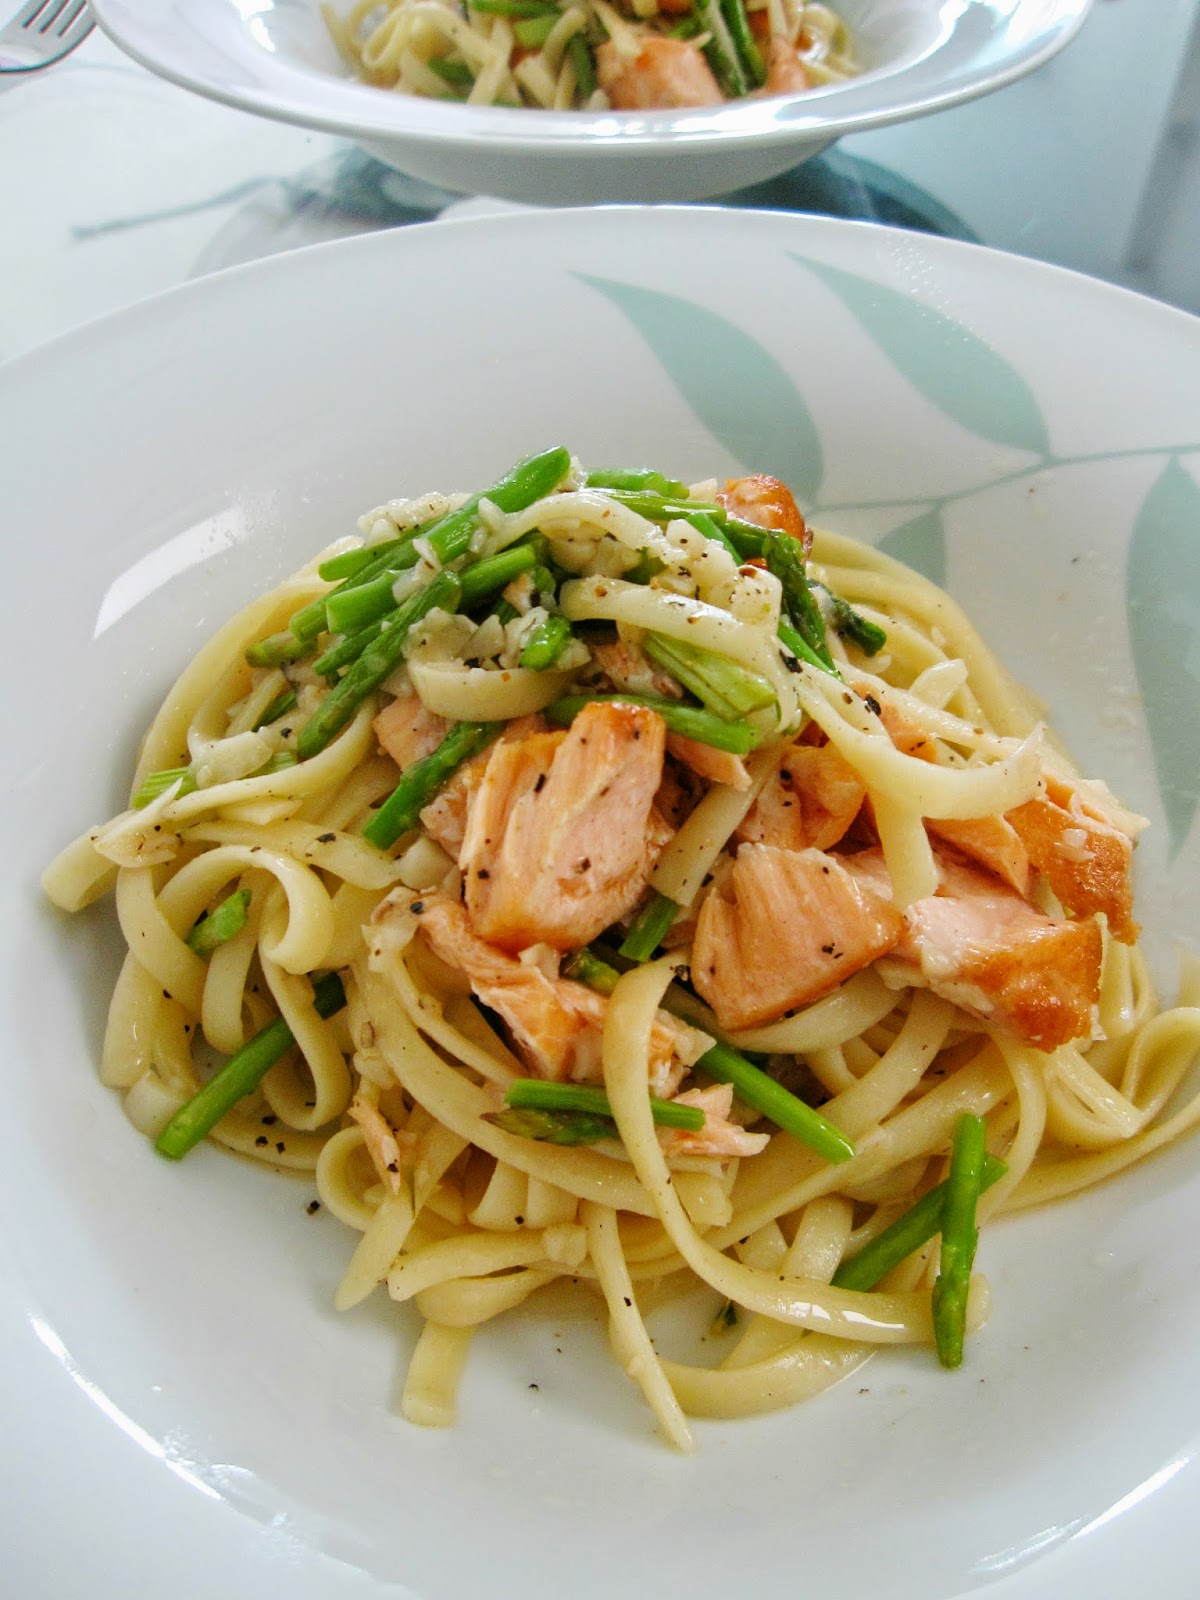
Aglio olio

Aglio (garlic) Olio (oil) my-style, with salmon and asparagus added to make it a healthier and delicious lunch.

Cooking a meal for my lil boy has been the only motivation why more thoughts and efforts are put in, if I'm home alone, I'll go for instant noodles anytime (equally delicious but unhealthy, isn't it?)

Aglio Olio
(serves 2)
Ingredients/ Method

Linguine (as I don't have spaghetti)
4 gloves garlic, minced
1 1/2 tbsp olive oil
cracked black pepper
salt
a dash of mixed herbs (as I don't have parsley)
salmon
thin asparagus, optional

  1. In a pot of hot water, add 1 tsp salt, boil pasta per instruction indicated on box.
  2. Drained and toss some olive oil to prevent pasta from sticking (if not cooking immediately). Reserve some pasta water. 
  3. In a pan, pan-fried salmon. Using fork, loosely breakup the salmon. Set aside. 
  4. In the same pan, with some salmon oil left-over, add 1 1/2 tbsp olive oil. 
  5. Add in minced garlic and stir fry till fragrant and lightly brown, about 1 - 2 mins. 
  6. Add in asparagus and fry for another 1 - 2 mins, or 80% cooked. Season with some black pepper, mixed herbs, and salt. 
  7. Add in pasta and continue frying for about 2 mins. Add 1-2 tbsp pasta water and let it simmer till sauce reduced, giving it an occasional stir. Takes about another 2 mins. 
  8. Turn off heat and add in salmon, and give it a few stirs to mix salmon with the pasta. 
  9. Ready to serve. 

Tokyo banana roll

Recently I've been doing a lot of blog-hopping and my to-do list is getting longer and longer. Definitely I won't be able to bake or cook as fast as I bookmarked an interesting recipe. Often times, the 'old' bookmarked recipe get forgotten and the 'new' bookmarked recipe cut the line, like This one.


It looks like a straight-forward recipe and I have 2 over-ripen bananas in the fridge. I'm not fully satisfied with the end result as my custard cream turned out slightly runny, and the sponge cake looks kinda rough when I sliced into halves. That's why you will see that I've some brown banana rolls too.

I guessed if I've followed the originator steps 100%, I should be able to achieve a much better results for the sponge cake. As for the custard cream, I noticed that it was quite runny when cooking it, but thought it will solidify after cool which didn't change much eventually. I may have to add more corn starch the next time I prepare this (which won't be too long...hehehe).

I've copied the recipe here for ready reference. Or you can also watch this Youtube video on How to Make Tokyo Banana Roll  https://www.youtube.com/watch?v=D6wxd72vM_A&feature=youtu.be. 

Banana custard cream 

Ingredients/ method: 
100g banana, without skin
1 egg
1 tbsp corn starch
3 tbsp granulated sugar (I reduced to 2 tbsp)
150ml milk
a few drops of vanilla extract
  1. In a bowl, mash banana with a fork
  2. Add all other ingredients and mix well.
  3. Strain the mixture through the sieve into a saucepan. 
  4. Put on low, stir constantly, and stop the heat when the cream starts to thicken. Mix well with the remaining heat. Add a few drops of vanilla extract. Leave to cool completely.
  5. Transfer the cream into a pastry bag or into a dish covered tightly with plastic wrap. (Make sure the cream sticks to the plastic wrap to keep from drying out). Chill in the fridge. 
Sponge cake
Ingredients/ Method
2 eggs
50g superfine sugar
35g cake flour
20g milk, room temperature
  1. Beat eggs and sugar with whisk in a metal bow. Placed it over the pan of hot water and melt the sugar and warm them up to 40 deg C. (I did not measure the temperature. When the egg white is warm to touch by hand, and there's no sugar grains, it should be ready.) 
  2. With an electric mixer, beat the batter on high speed for about 5 mins until white and fluffy. Then on low speed, beat for about 2 mins to set the texture. 
  3. Sift in the flour and fold together with spatula for about 10 mins. 
  4. Add milk and fold together with spatula for about 50 times until combined. (For Steps 3 & 4 , I used my KA on speed 1.) 
  5. Spread the batter in a lined 9" square tin. Drop the pan lightly on the counter to raise the air bubbles out of the batter. 
  6. Bake at preheated oven 180 deg C for 11-12 mins or until lightly brown. 
  7. When it's done, drop the pan lightly to prevent shrinking. 
  8. Remove the sponge cake from the pan by lifting the wax paper and place it on a wire rack to cool.
  9. When the cake is cool, remove the parchment paper and place the sponge cake on the parchment paper with brown side up.
Assembly
  1. Cut the sponge cake into 4 squares. Then cut them by half horizontally (will have thin slices, about 0.2 inch).
  2. Place the cake on plastic wrap (with brown side up), pipe out the banana custard cream, roll and securely twist the ends like a candy.
  3. Serve chill. 

Wednesday, September 24, 2014

Rainbow cake

Another check on my to-do list ~ Rainbow cake! Looking at the cake itself makes one so happy lol.

I'm using my usual vanilla sponge cake recipe to make a 7-layers 4.5" round cake. I'm also using my now-favourite cream cheese frosting. Both the sponge cake and frosting turned out very good!


My frosting skills is still quite bad, so I've to create some "designs" to hide the flaws.


Vanilla Sponge Cake

Ingredients/ Method:
(A)
150g cake flour/superfine flour
1/2 tsp (2g) baking powder
1/4 tsp (1g) salt
10g milk powder

(B)
60g cooking oil
50g water
4 (75g) yolks
80g castor sugar
1 tsp vanilla extract

(C)
4 (150g) whites
90g castor sugar (original 100g)
1/4 tsp (1g) cream of tartar

(D)
Colour gel
  1. Sift ingredients (A) and put it aside
  2. Whisk yolks and sugar till it turns lemon color
  3. Add oil, water and vanilla and mix till well blended
  4. Add ingredients (A) and mix it slowly till it forms a smooth batter
  5. Whisk (C) till stiff
  6. Fold in 1/3 of egg white mixture into egg yolk mixture and gently stir, then fold in the remaining egg white mixture and mix well gently
  7. Divide batter equally into 7 portions and into individual small bowls. (I got about 90g for each portion, but I would reduce it to 60-70g the next time.)
  8. Add colour gels into batter and mix well gently, and not to deflate too much air bubbles.
  9. Pour batter into lined cake tin. (I used disposable aluminum foil-type 4.5" round tin as I don't have so many cake pans.)
  10. Bake in a preheated oven 180C for 10-12 mins or when skewer comes out clean when inserted to the centre of cake.
  11. Removed from oven and let cake cool in pan for 5 mins on wire rack.
  12. Remove cake from pan and let it cool completely on wire rack.
Notes:
  1. If using the same size 4.5" round tin and 7 layers, just need to prepare 2/3rd of this recipe. Alternatively, you can bake the balance 1/3rd batter as vanilla cupcakes.
  2. As my oven can only bake 4 small tins at a time, I mix the egg yolk mixture and egg white in 2 batches.
  3. I used toothpick when adding and mixing colours to the batter, and using a small spatula to give a last few folds to ensure colours are evenly mixed.
  4. Insert straws to hold the cake, especially when this cake base is small and pretty tall. 
Cream cheese frosting
250g cream cheese
170g unsalted butter, softened
70g icing sugar, sieved
1 tsp vanilla extract
  1. Using an electric mixer on medium-high speed, beat butter and cream cheese until fluffy, about 2 to 3 minutes.
  2. Reduce speed to low. Add sugar in three batches, then add vanilla and mix till smooth and combined, scraping down sides of bowl as needed. (If not using immediately, frosting can be refrigerated up to 3 days in airtight container. Before using, bring to room temperature and beat on low speed until smooth again.)

Baked chicken thighs

Another quick and easy lunch. Happy tummy, happy boy!


Baked chicken thighs 

Ingredients/ Method 
Main 
2 medium-sized chicken thighs
2 tbsp oyster sauce
1 tsp ground ginger powder
1 tsp ground white pepper
4 cloves garlic, roughly pound with skin

Sides/ Veg
Thin asaparagus
1 potato, cut in big cubes
1/3 Japanese cucumber, cut in big cubes
1/3 white onion, sliced
2 cloves garlic, sliced thinly

1 tbsp olive oil/ macadamia oil
Black pepper, cracked
salt

  1. Marinate the chicken thighs overnight, or at least 4 hours.
  2. Place the chicken thighs on a tray, lined with aluminium foil so there is minimal washing. Pour the remaining marinate over the chicken.
  3. Put all the sides/veg (can be any kind of sides you like) in the same tray as the chicken thighs. Drizzle olive oil/ macadamia oil over the sides/ veg, and sprinkle cracked black pepper and salt as well. 
  4. Bake in pre-heated oven 190 deg C for 30 mins. I baked a further 3 mins on grill function to get a little charred on the chicken. 
  5. Drizzle the chicken oil/ juice on the chicken thighs and sides/ veg before serving. 

Tuesday, September 23, 2014

Pan fried salmon

Our simple but high-omega lunch today. Just sprinkle salt and cracked black pepper as seasoning. Add some sides to make it healthier - we have potatoes, thin asparagus, baby carrots, white onion and sliced garlic.


Superman 2-tier cake

Another birthday cake for my nephew 6th birthday!
 

Instead of the usual chocolate cake base, I found another similarly good one which was used by Jane in her salted caramel cake.


Chocolate cake 
(recipe adapted from Passionate About Baking, originally from Martha Stewart)

Ingredients/ Method
375g plain flour
380g castor sugar
129g unsweetened dutch-processed cocoa powder
1 tbsp baking soda
1 1/2 tsp baking powder
1 1/2 tsp coarse salt
4 large eggs
368g buttermilk (or 366g whole milk with 1 1/2tsp lemon juice, mix well and let it sit for 5 mins)
90g warm water
137g vegetable oil
2 tsp vanilla extract
  1. In a bowl, sift flour, sugar, cocoa powder, baking soda, baking powder and salt. Beat on low speed until just combined.
  2. Add eggs, buttermilk, warm water, oil and vanilla extract and beat on medium speed, until smooth. Takes about 3 mins.
  3. Pour batter equally into two 9" lined round cake pans. 
  4. Bake on pre-heated oven 180 deg C for about 35-40 mins, or until skewer inserted into centre of cake comes out clean. 
  5. Let cake cool in pans on a wire rack for 15 mins. 
  6. Remove cake from pans onto wire rack, and let cool completely. 

Monday, September 22, 2014

Pineapple coconut muffin


I always wanted to bake something with pineapples and coconut. And when I have balance canned pineapples after making pizza and coconut milk after baking pandan chiffon cake, it was a good time to clear the fridge too! It also had been a long time since I last baked muffins and this quick and easy recipe yields a very moist and coconut-y one!
 
Pineapple coconut muffins
(recipe from Serious Eats, with modifications. Makes 18 muffins)

113g (4 ounces) unsalted butter, soft
175g castor sugar (reduced, can increase to 200g if you want it sweet)
1/4 tsp salt
2 large eggs
1/2 cup coconut milk
1/4 cup plain yogurt
100g desiccated coconut (to reduce to 75g), leave some to sprinkle on top of muffin
195g plain flour
2 1/2tsp baking powder
240g (1 cup) drained pineapple cubes/ slices, chopped

  1. Line muffin pan with cupcake liners.
  2. Beat butter with sugar and salt in a large bowl until creamy.
  3. Whisk in eggs, one by one, until combined.
  4. Add in coconut milk and desiccated coconut and whisk till combined.
  5. Add in sifted flour and baking powder and whisk till combined.
  6. Stir in chopped pineapples. Do not over-mix.
  7. Scoop batter into muffin cup and sprinkle desiccated coconut on top.
  8. Bake at pre-heated oven 180 deg C for 20 mins - 22 mins.
  9. Cool on wire rack.